
Who to Contact
|
Last Name A-E
Last Name F-McC
Last Name McD-Sul
Last Name Sum-Z
|
Counselors provide support for students with anything relating to registering for classes, understanding graduation plans, dual enrollment questions, college and career counseling, emotional support needs, potential issues with enrollment, or questions relating to academic status.
|
NAVIGATING THE OMHS
(Online Middle/High School)
Access Student E-Mail
Keep up with your emails daily to stay on track
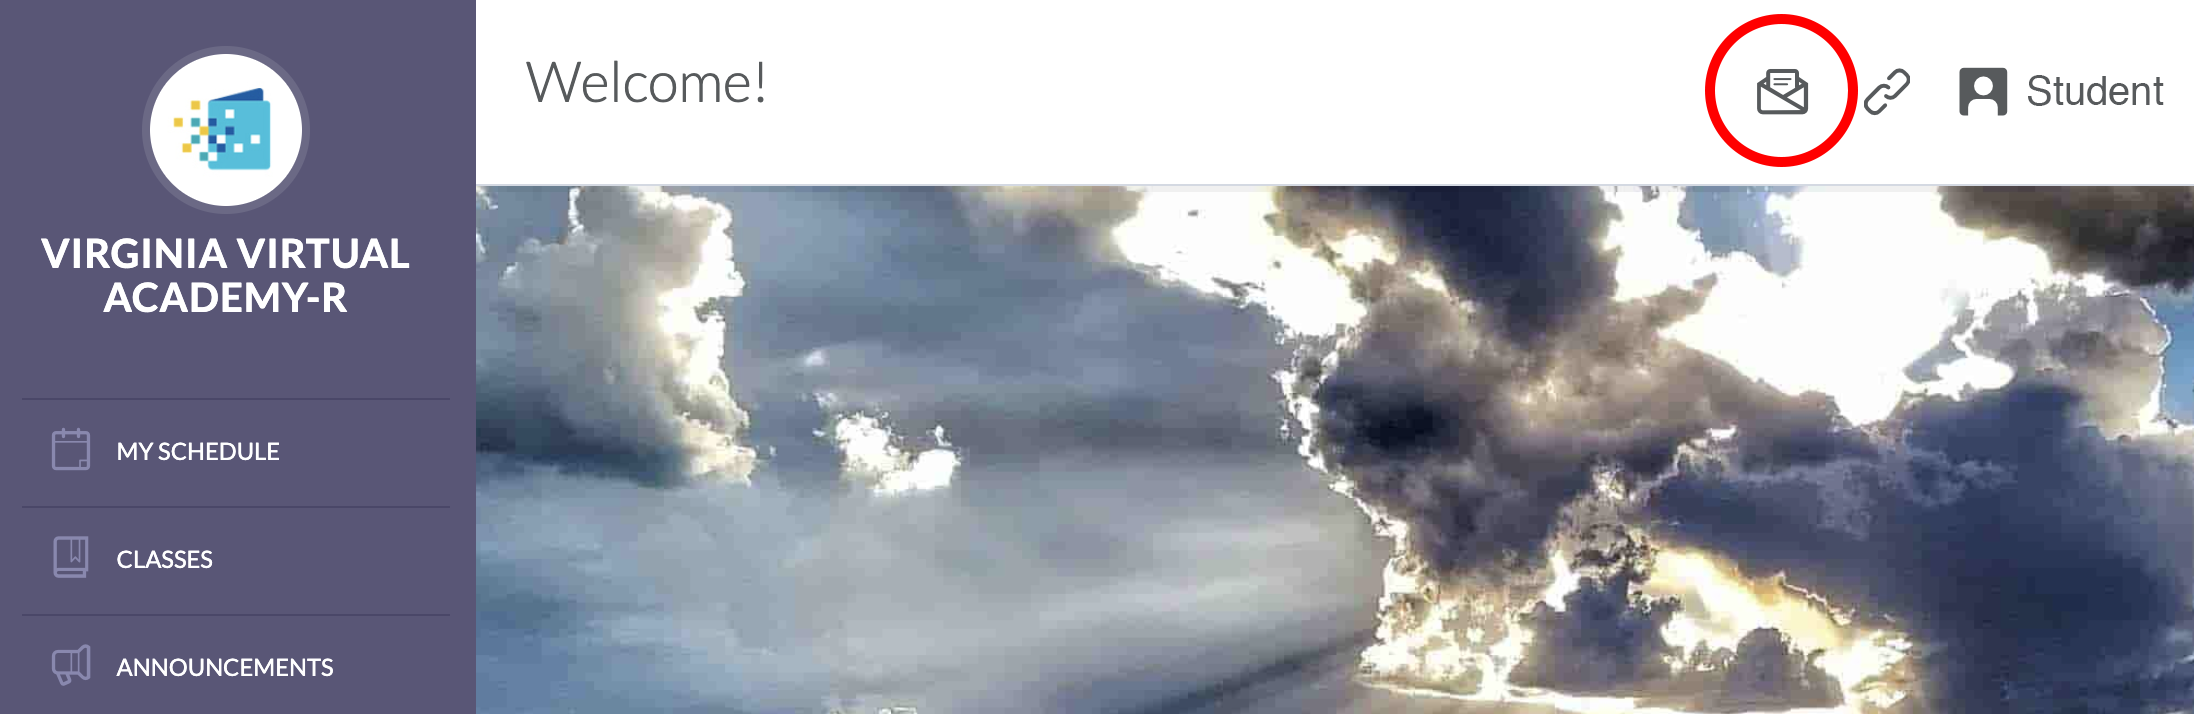
1. Log into the OMHS
2. In the top right corner click on the E-Mail icon. This will take you directly to your web based student e-mail.
|
3. You can also install the outlook app on your phone or tablet to access your @vavirtual.com email address using your VAVA provided Microsoft Office 365 account.
Click here for instructions |
How do I know what to do each day?
Creating a Daily Routine
|
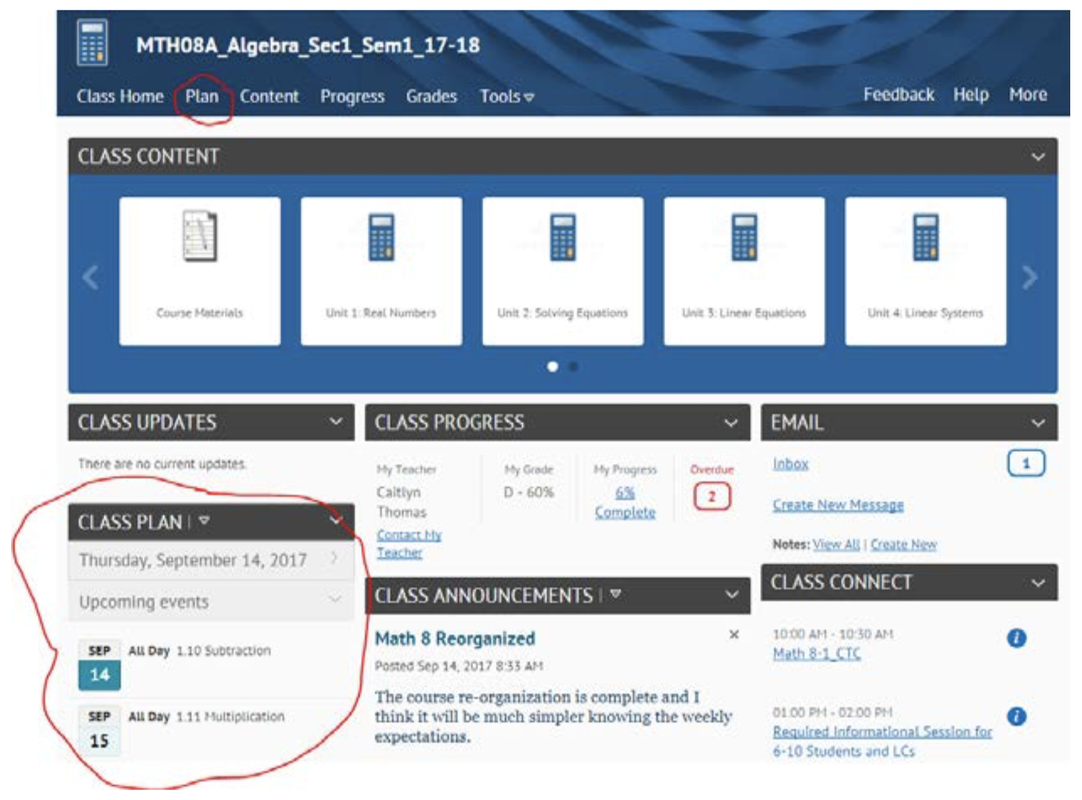
Login to OMHS and click on your course that you’d like to start with. The first thing you should do is check Class Announcements right in the center of your course page for any important updates or course information.
Then hit the Class Plan, circled both in red below, you can get to the Class Plan either way. |
|
|
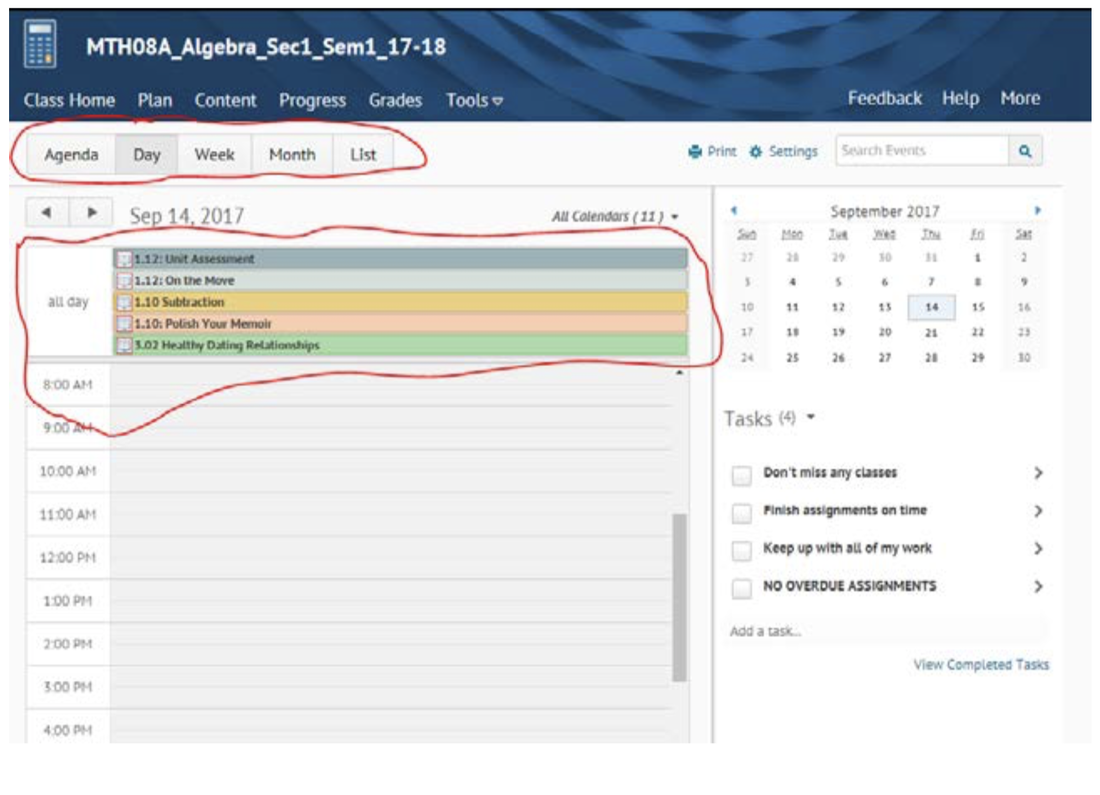
Once you are in the Class Plan, all of your coursework for the day will show up in different colored tabs (second red circle below) each of your courses being a different color. The first red circle highlights all of your different views for the Class Plan, the default is Day, but you may view it whatever way is most comfortable for you.
|
|
|
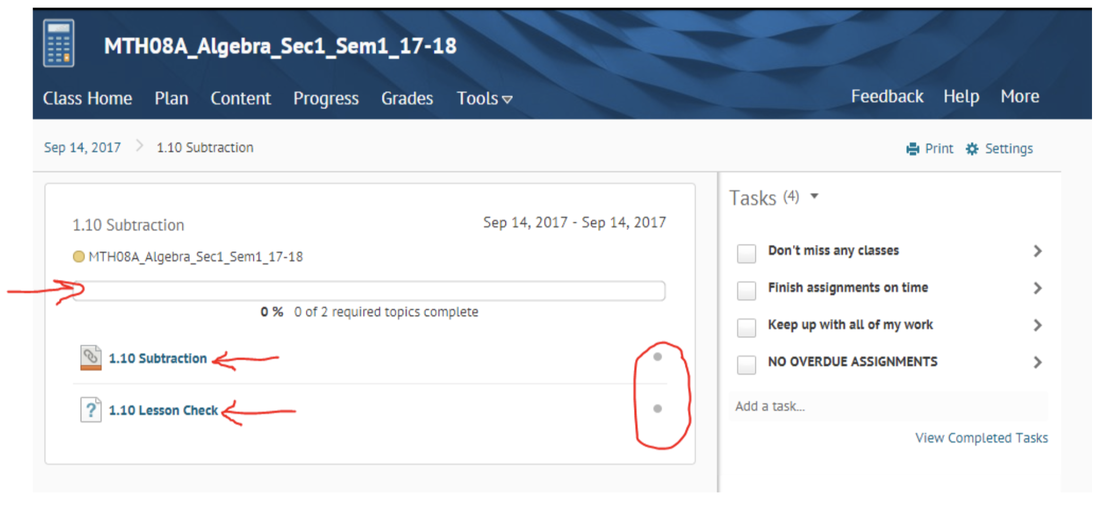
Put your cursor over one of your course topics (in the example below 1.10 Subtraction in Orange) and click on it. The white box as shown below will pop up. Select More..., circled in red below.
|

|
|
Clicking “More...” will bring you to this page. The top bar(right pointing red arrow) will tell you what % complete you are for the day’s tasks. Below it there will be a list (two left pointing red arrows) for the tasks you must complete that day for the given course. Those tasks are links that will take you directly to that content. Circled in red, you will see two gray dots. Once your tasks are complete, these dots turn to check marks. Once all of your tasks are complete for the day, in the selected course, it will read 100% complete at the top and you will have check marks next to the assigned work. Then move on to your next course.
|
|
Due Dates vs. End Dates
Assignment dates explained
Our assignments have three dates:
FAQ: What happens if I don't submit the assignment by the Due Date?
A: The teacher will most likely enter a 0 for the assignment in your gradebook indicating that the assignment has not been completed. However, you are still able to submit the assignment until it's end date for full credit and your grade will be adjusted upon submission and review.
FAQ: What happens if I don't submit the assignment by the End Date?
A: The teacher will enter a 0 for the assignment in your gradebook and and you cannot submit it for credit after that point
- Start Date - The date the assignment becomes available for the student to begin working
- Due Date - The date the assignment is expected to be done to keep on schedule with the progression of the course. Assignments CAN be turned in after this date for full credit, but continually missing due dates indicates that you are falling behind in the class
- End Date - The date the assignment is NO LONGER available for the student to complete
FAQ: What happens if I don't submit the assignment by the Due Date?
A: The teacher will most likely enter a 0 for the assignment in your gradebook indicating that the assignment has not been completed. However, you are still able to submit the assignment until it's end date for full credit and your grade will be adjusted upon submission and review.
FAQ: What happens if I don't submit the assignment by the End Date?
A: The teacher will enter a 0 for the assignment in your gradebook and and you cannot submit it for credit after that point
Find Your Student ID and Grad Plan
1. Log in to the OMHS
2. In top right corner, click on chain link icon next to your name, Then click Graduation Plan
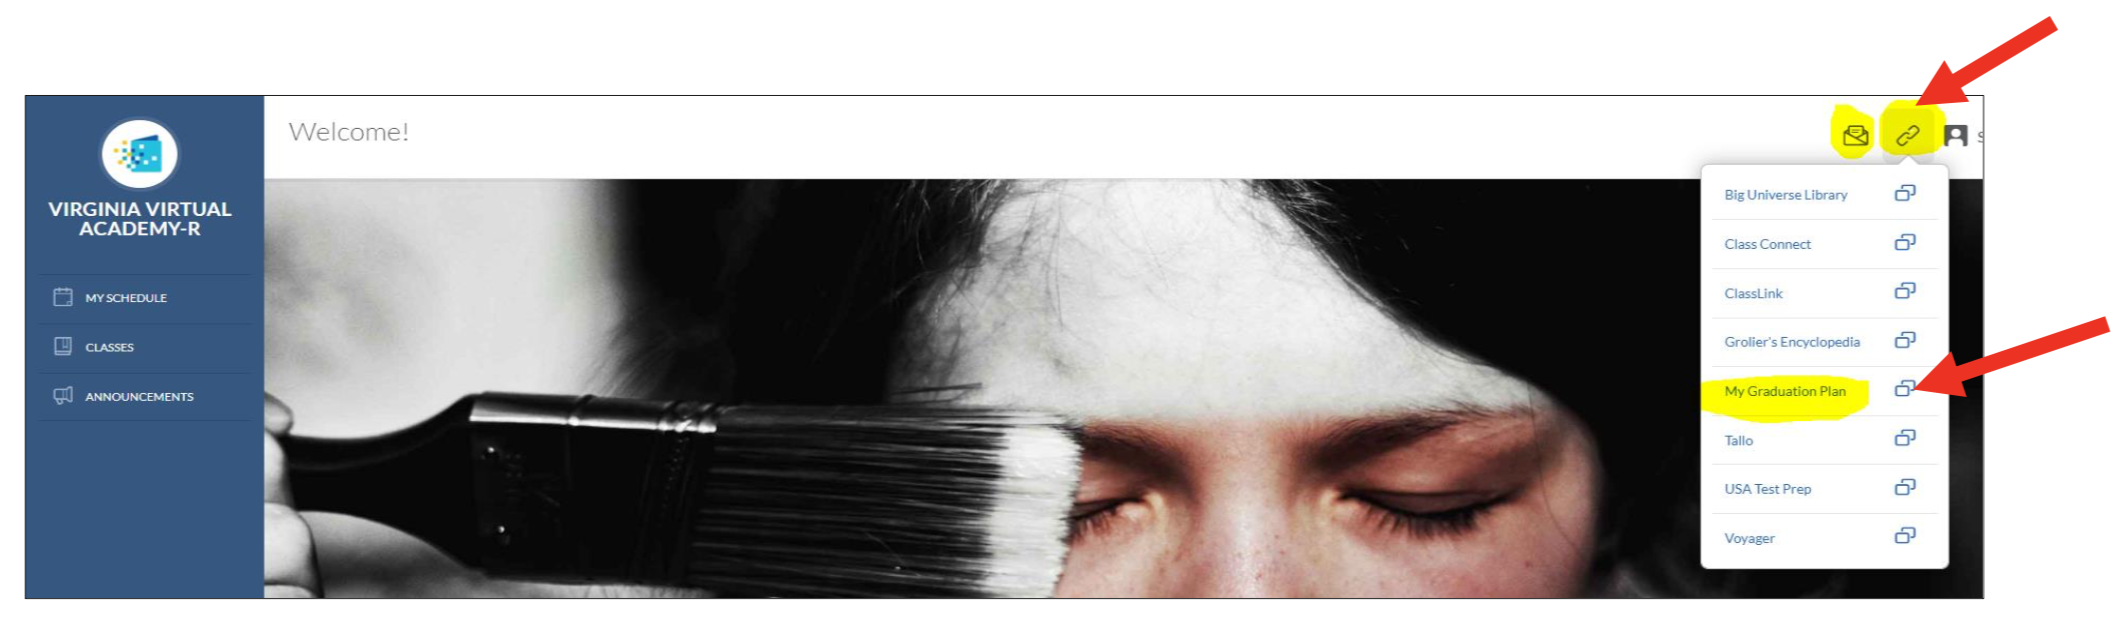
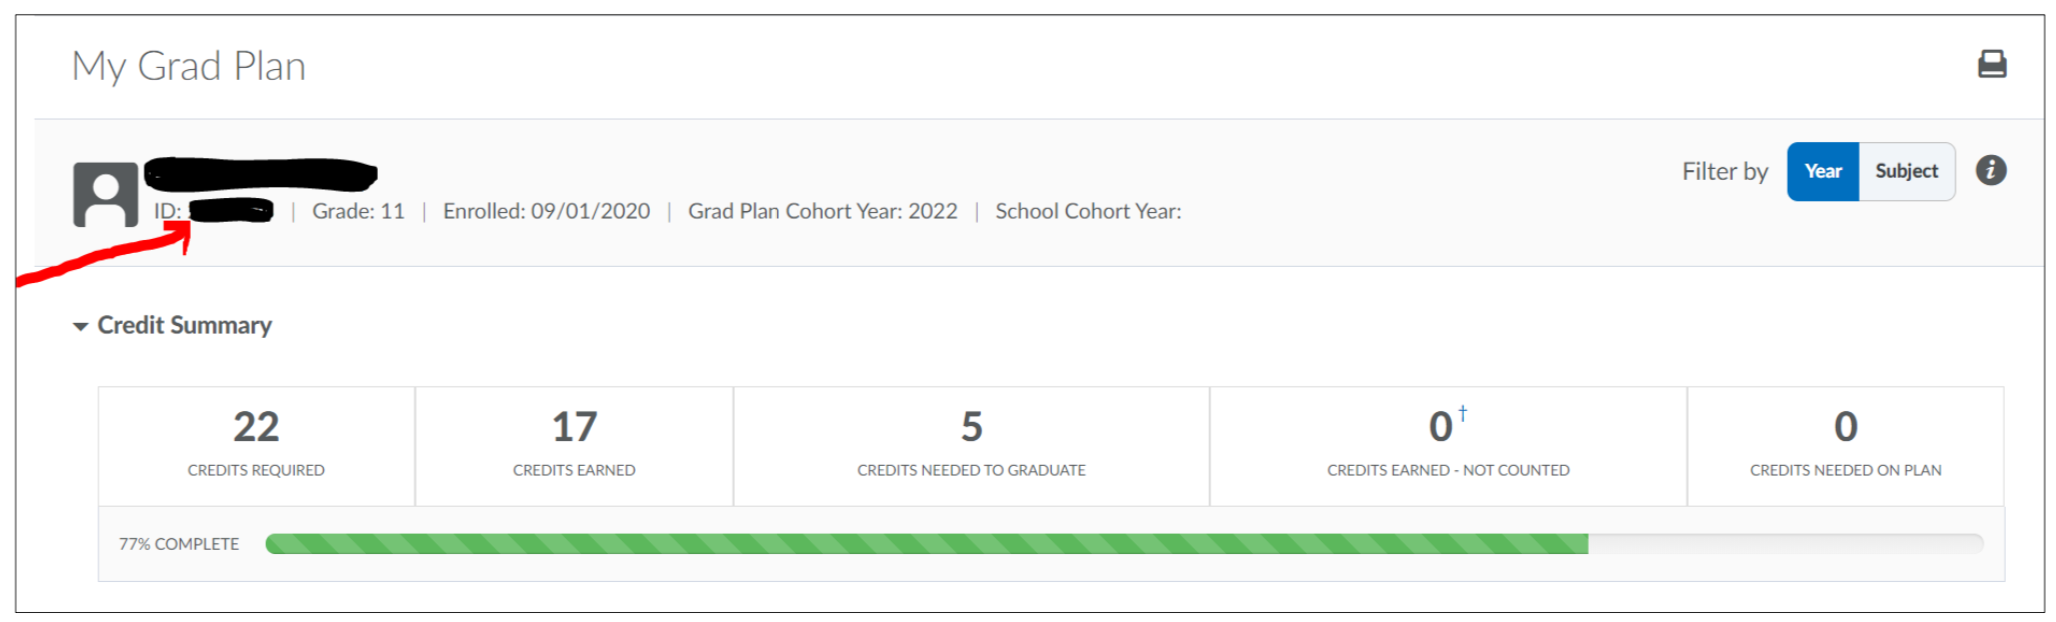
3. You will be taken your graduation plan where you will see your courses for each year and how many credits you have earned so far.
4. When you click into the graduation plan, your student ID number is located right under your name.
Screenshot Tools
Quickly capture and share what's on your screen
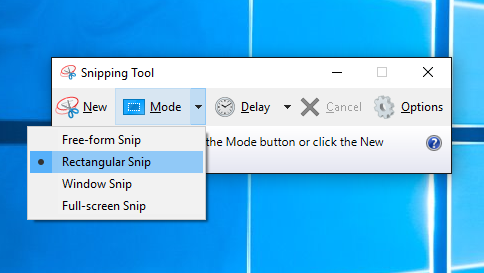
Windows Snipping Tool
The snipping tool is a great way to make a shareable image of something on your screen and is one of the most useful tools in your virtual bag of tricks as you navigate online school and work beyond!
1. Select the Start Button (bottom left corner of your screen)
2. Type "snipping tool" in the search bar
3. Right click on the icon and select "Pin to taskbar" to keep it readily accessible for you as you will likely be using it all the time!
4. To take a new screenshot using the same mode you used last, select New. Or, to choose the type of snip you want, select Mode (or, in older versions of Windows, the arrow next to New), and then choose a capture mode. When making free-form or rectangular snips, use your mouse to select the area that you want to capture.
5. Use the Save and Copy buttons at the top of the snip to save or copy it to the clipboard where it can be pasted into whatever you are working on
6. If you are saving the image be sure to rename it something descriptive or useful to avoid having a folder full of images with very similar names that will be difficult to sort through later
Mac Screenshot Tool
The Mac screenshot tool is called Screenshot in MacOS Mojave and above and Grab in older versions of the OS. Click here for the official Apple Help Article on how to create screenshots on a Mac.
1. Press Command Space on your keyboard to bring up the spotlight search bar
2. Type "Screenshot" into the search bar ("Grab" if you're on an OS below Mojave) to open the application and choose whether you want to capture a window, selection, or the entire screen
3. Screenshots are saved by default on the desktop with the title ”Screen Shot [date] at [time].png.”
How to add Vacation Days in OMHS/OLS
Make sure to record when you'll be out to avoid attendance issues
Watch the video walkthrough below or continue on for written instructions
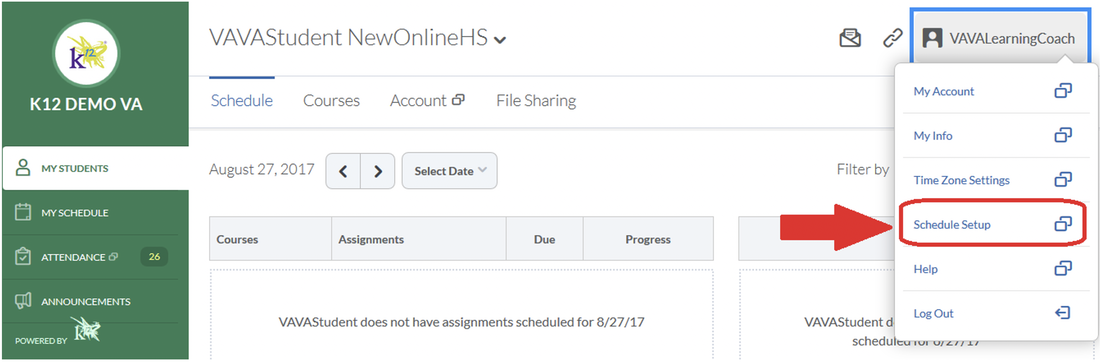
1. Log into OMHS/OLS using learning coach username and password.
2. In the upper right, click on learning coach name to access the dropdown menu. Select Schedule Setup.
2. In the upper right, click on learning coach name to access the dropdown menu. Select Schedule Setup.
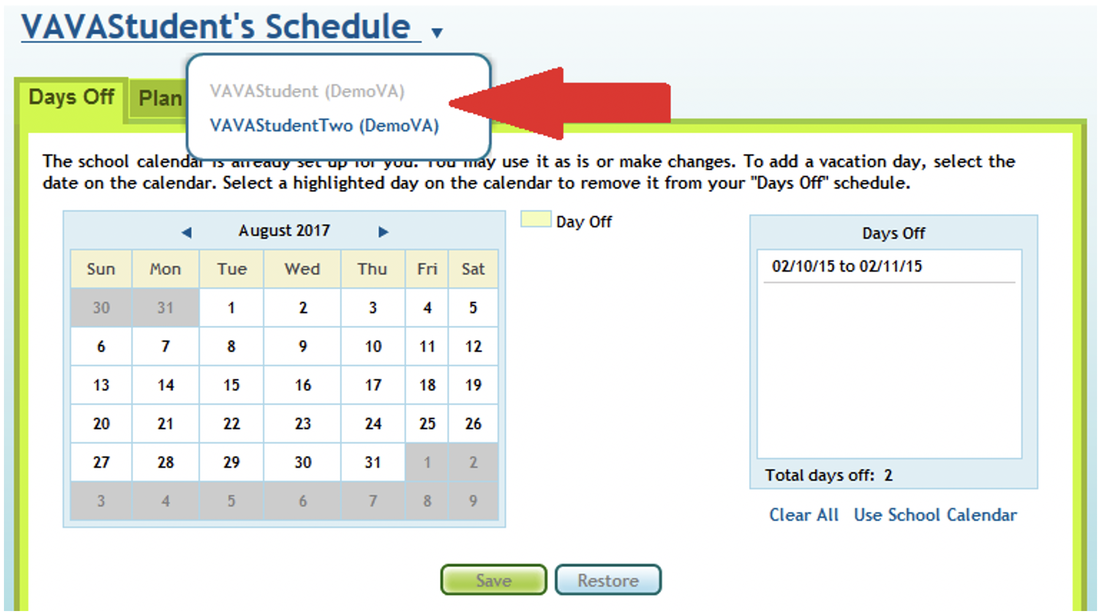
3. Click on the dropdown arrow to select the student for whom you wish to add vacation days.
4. To select your own vacation days, click on the date in the calendar. The date you select will appear in the white box on the right side of the screen. Use the right and left arrows on the calendar to select the month.
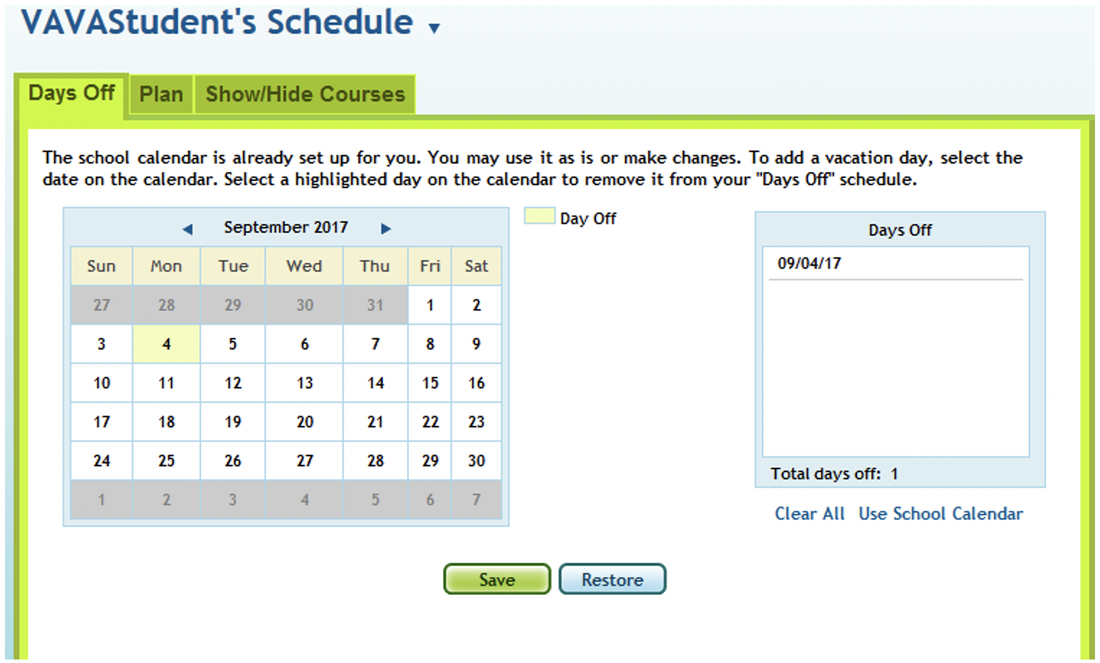
5. After you have selected all the days you wish to add for vacation days for the school year, click on Save at the bottom of the screen.